Setting up your Timetable
You can add your timetable to your streaming page on My Fit Pro so your members can see your upcoming classes.
Watch the walk-through video, and keep reading for step-by-step screenshots.
Setting up your first timetable
-
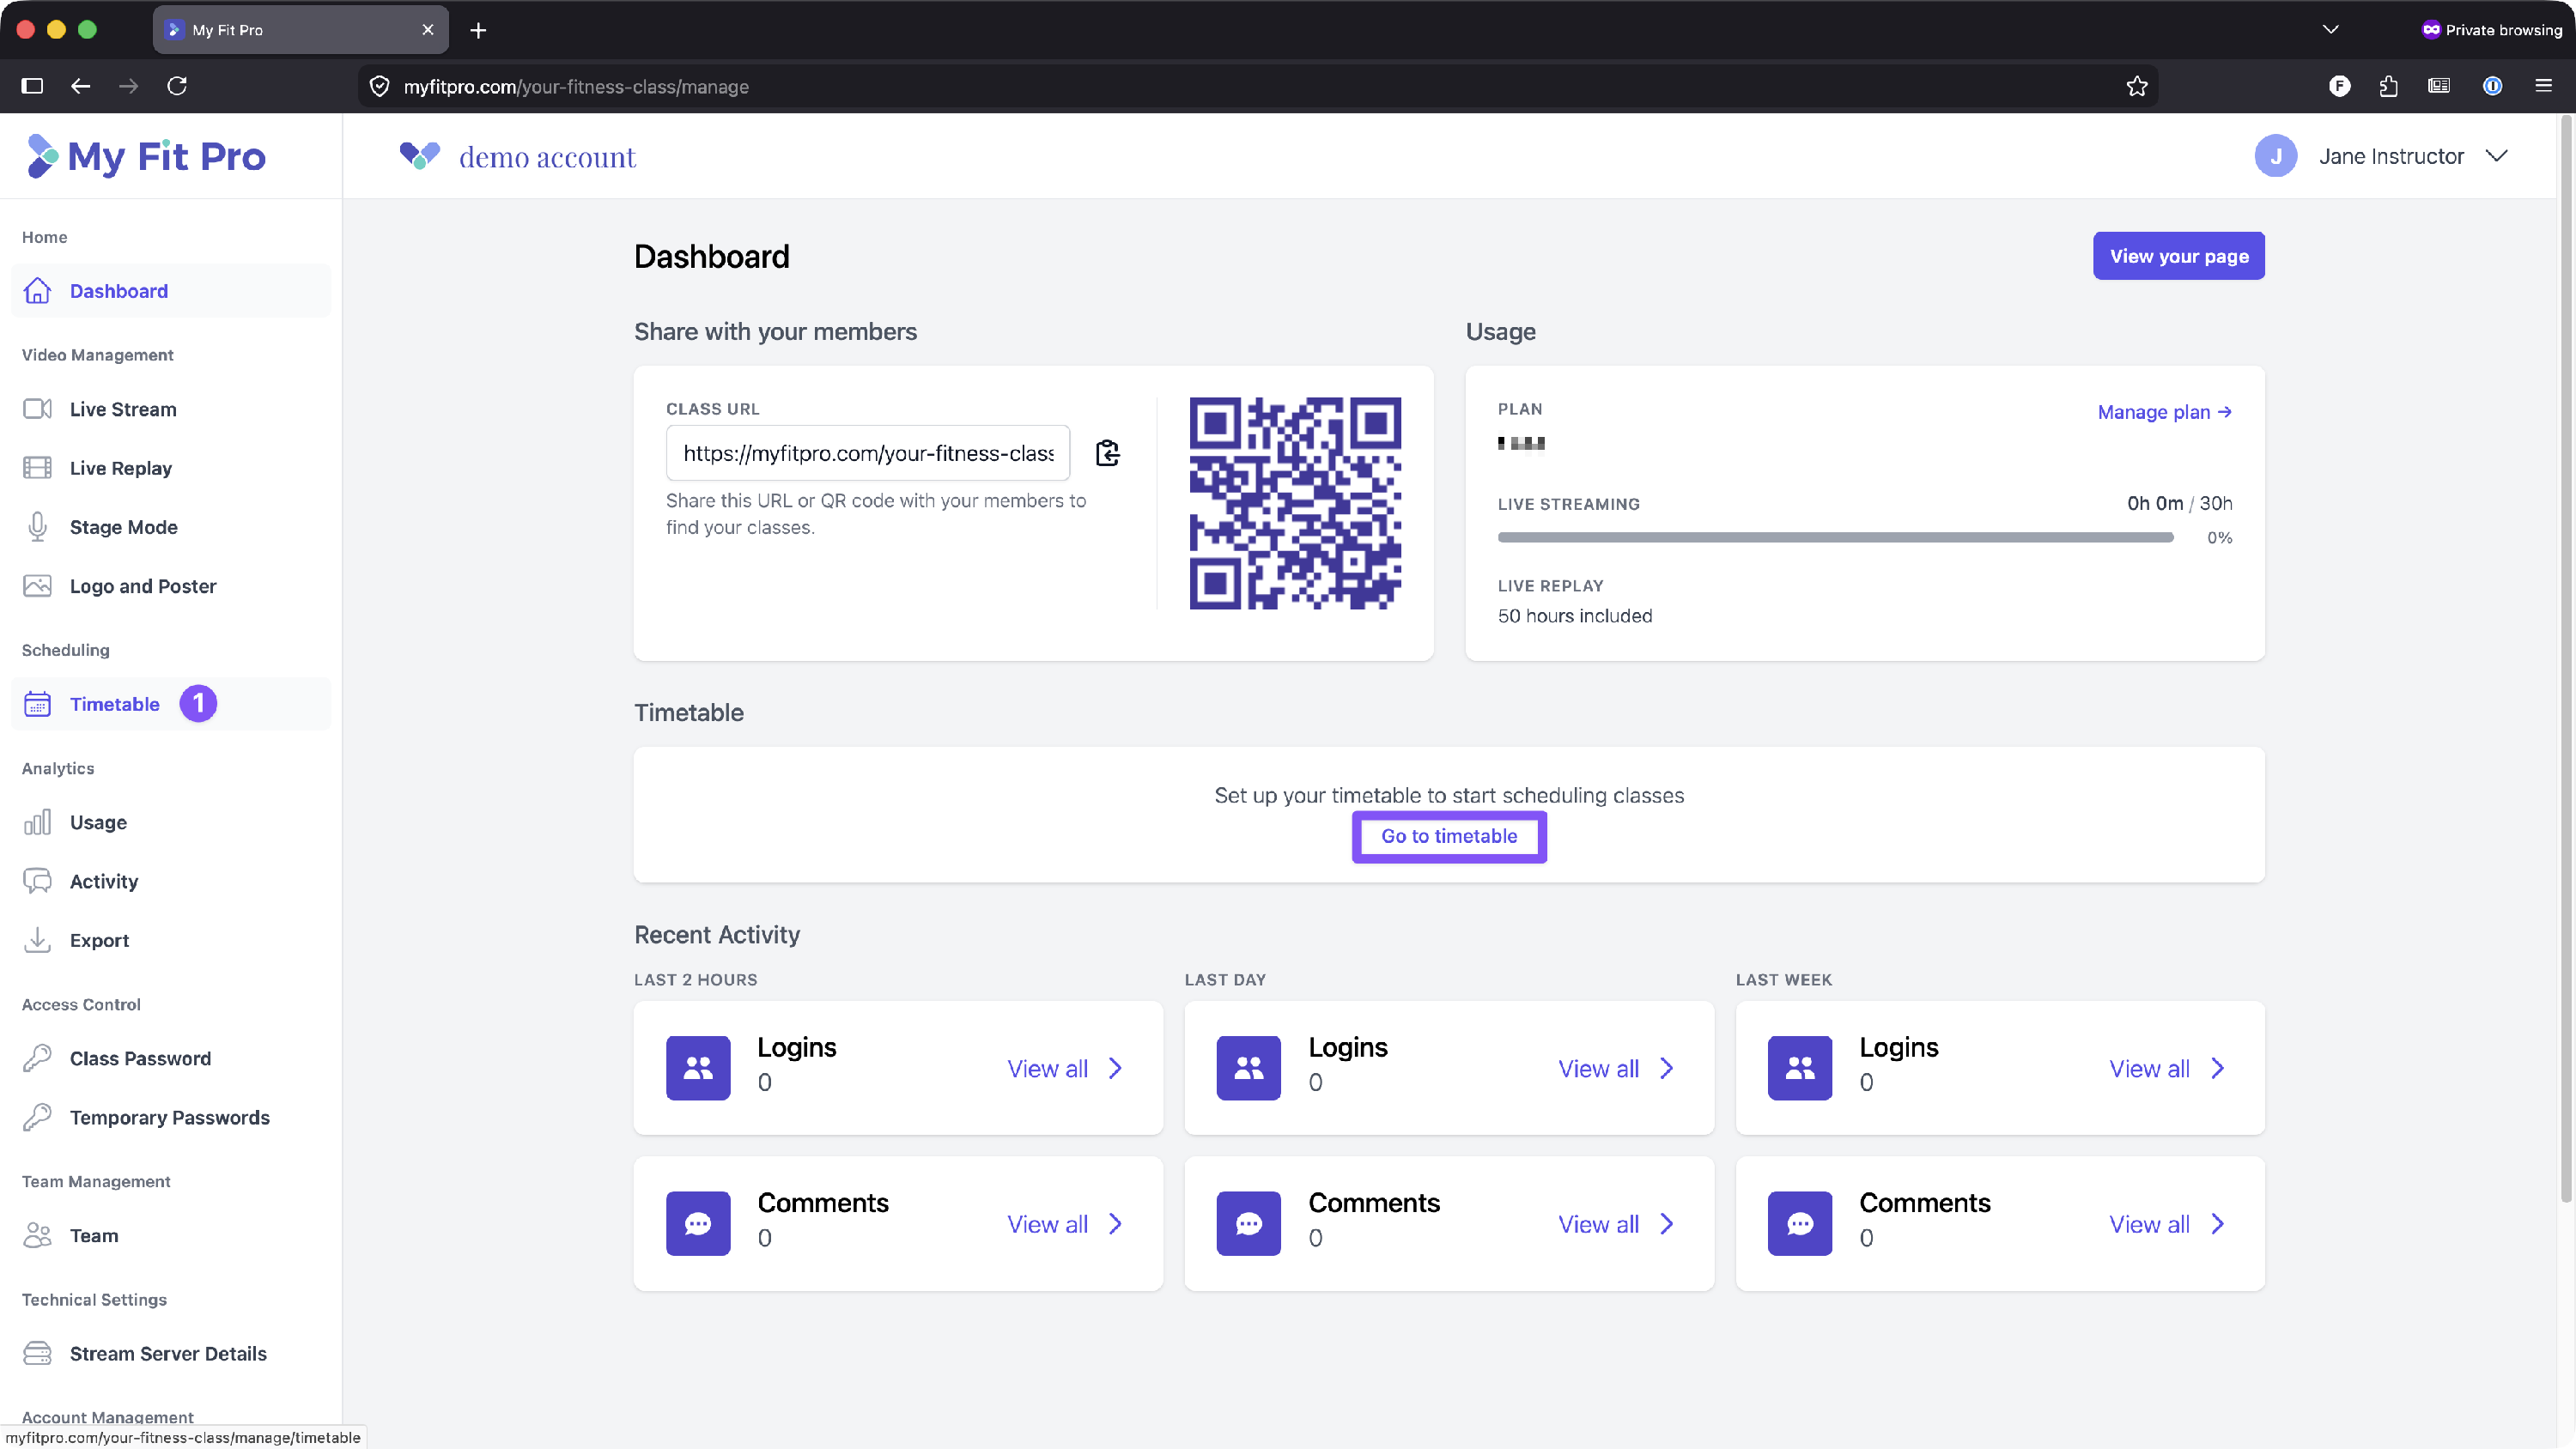
From your Class Owner Dashboard, scroll down to Timetable in the left menu, or click on Go to timetable from the "Timetable" section in the middle of your dashboard.

- First, you should set up your class formats by clicking on the Formats tab.

- Type the name of your class format, and click Add Format.

- Next, click on the Settings tab. This is where you'll set the rules for how to display your timetable to your members.
- Choose a "Look ahead" period. This tells the timetable how many weeks to display to your members.
- Choose if you want to display the timetable publicly (to people who aren't logged in as members). Keep this unchecked if you only want logged in members to view your timetable.
- Choose if you want to show class capacity. You can leave this unchecked if you don't want to display the capacity.
- Click Save Settings

- Now it's time to add your classes. Click on the Classes tab.
- Click on +Add Class

- Type a name for your class
- Choose the format (which you set up earlier in Step 3)
- Enter an (optional) capacity

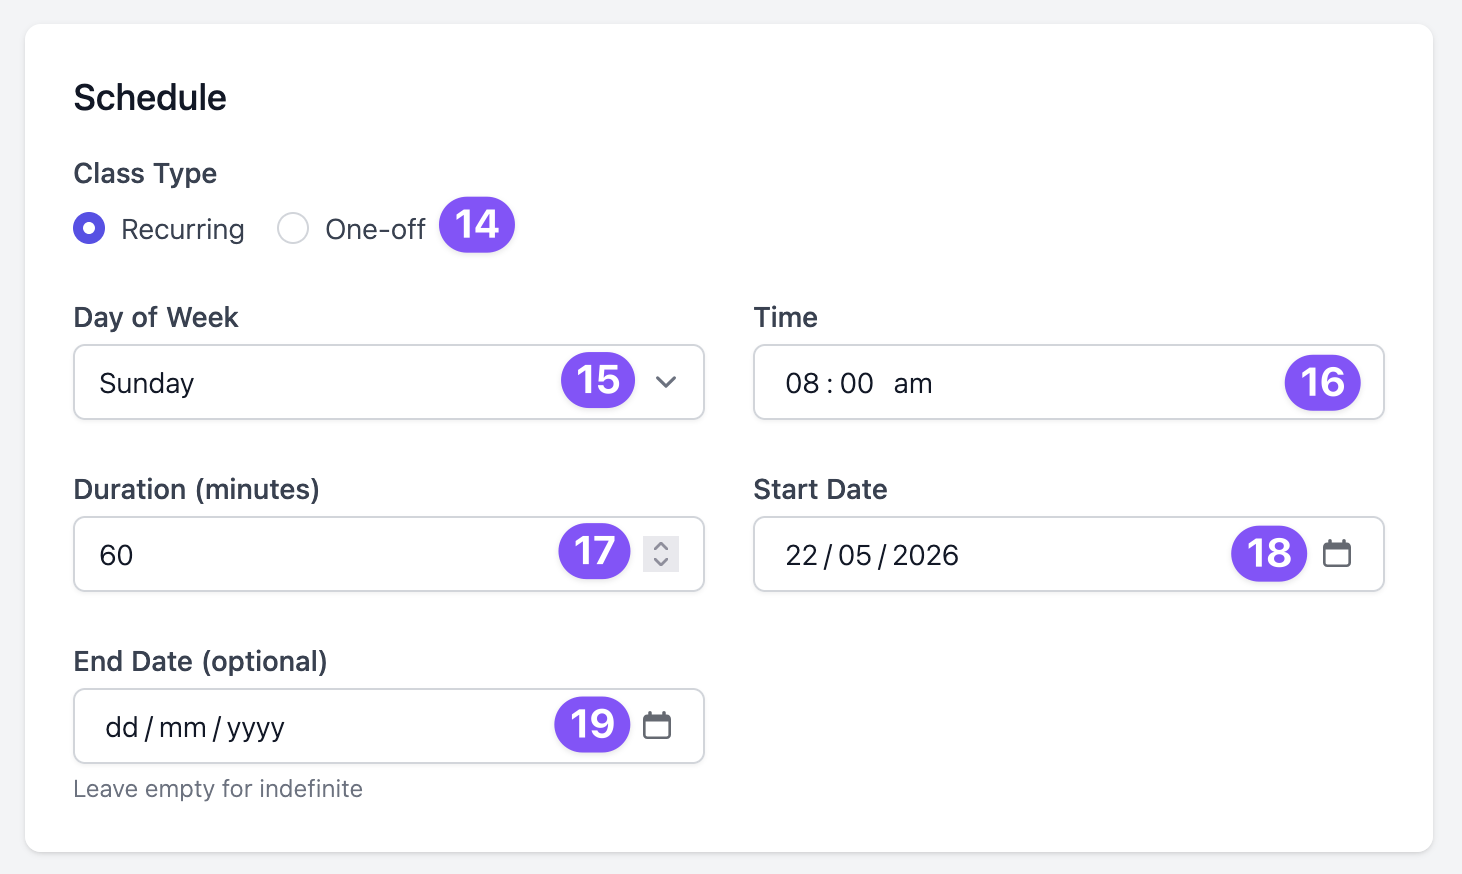
- Now you'll set your schedule. First, choose if this class is recurring (ie. repeats at the same time every week) or if it's a one off class.
- Choose the day of the week
- Enter the time of the class
- Enter the duration (in minutes) of the class
- Choose a start date
-
Enter an optional end date
-
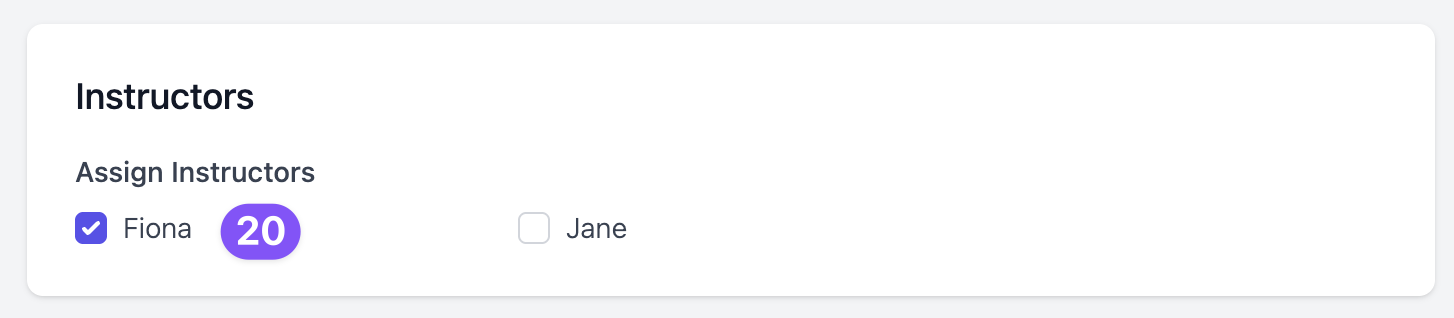
Optional: Choose one or more instructors for this class. Names will appear as per the team members you invited to your Class Owner Dashboard. See Invite Your Team. You can leave this blank if the instructor varies.
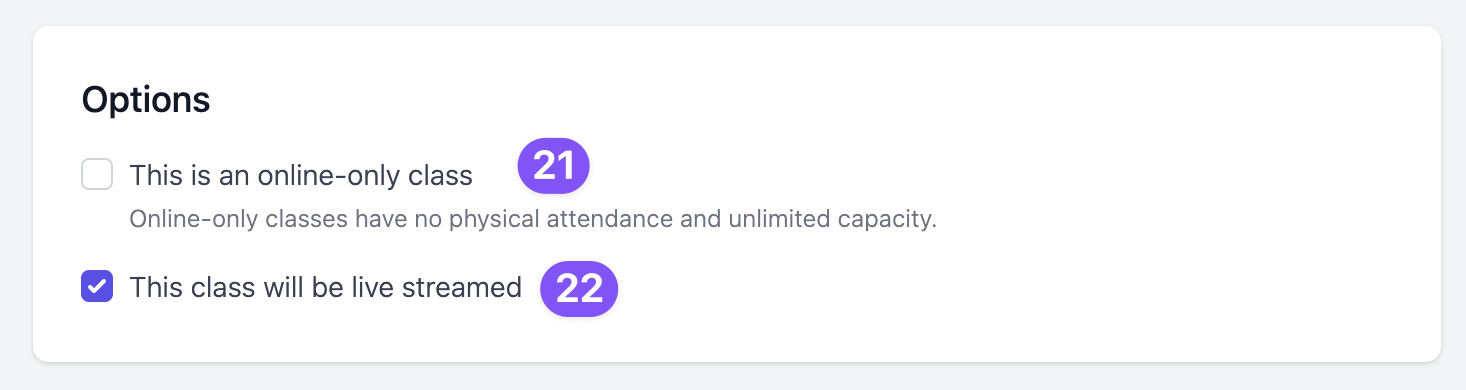
- Choose if the class is online only. Leave this unchecked if you're streaming from your in-person class.
-
If your class won't be live streamed, uncheck this box.
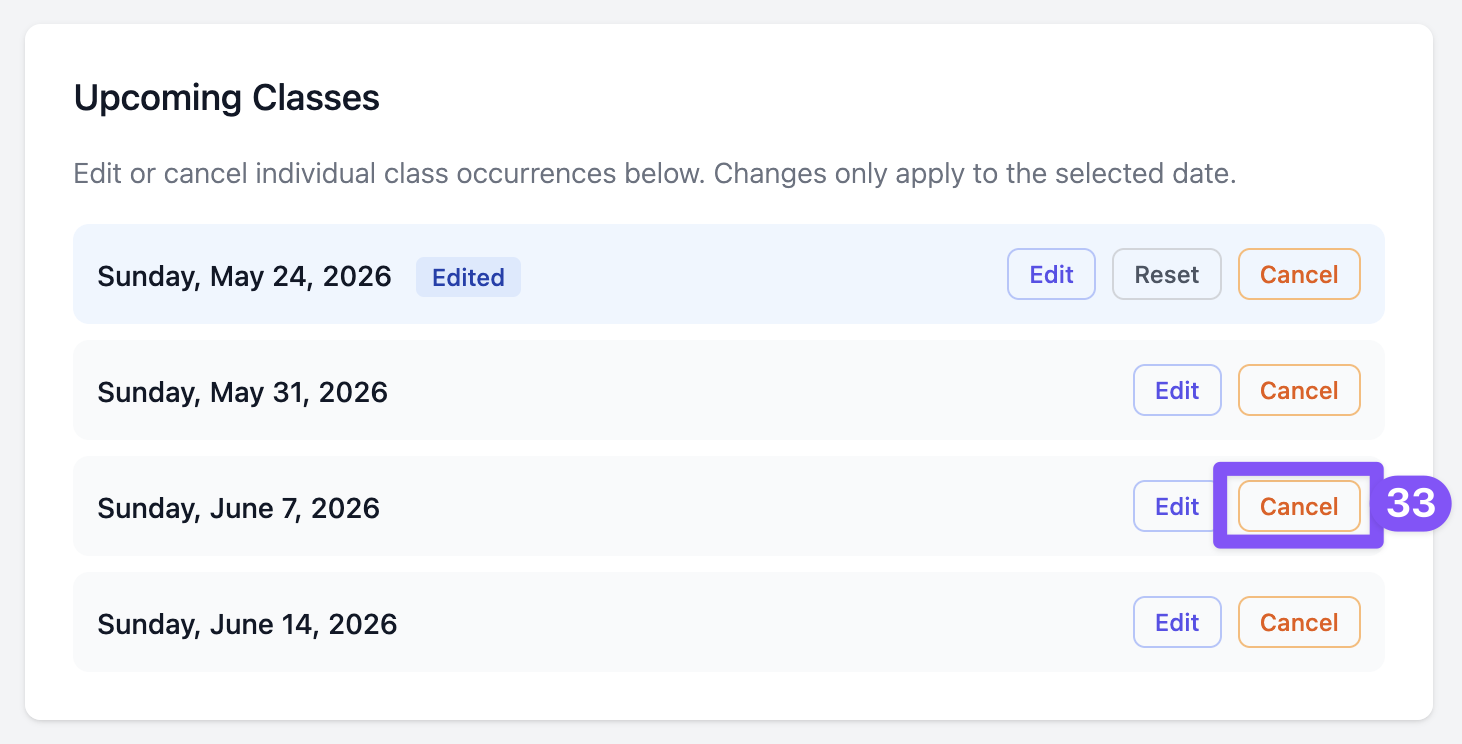
- Once you've saved your class, you'll see a confirmation green banner. You can then Edit the class, including one of edits or cancelling individual classes, by clicking the Edit button.


Editing classes
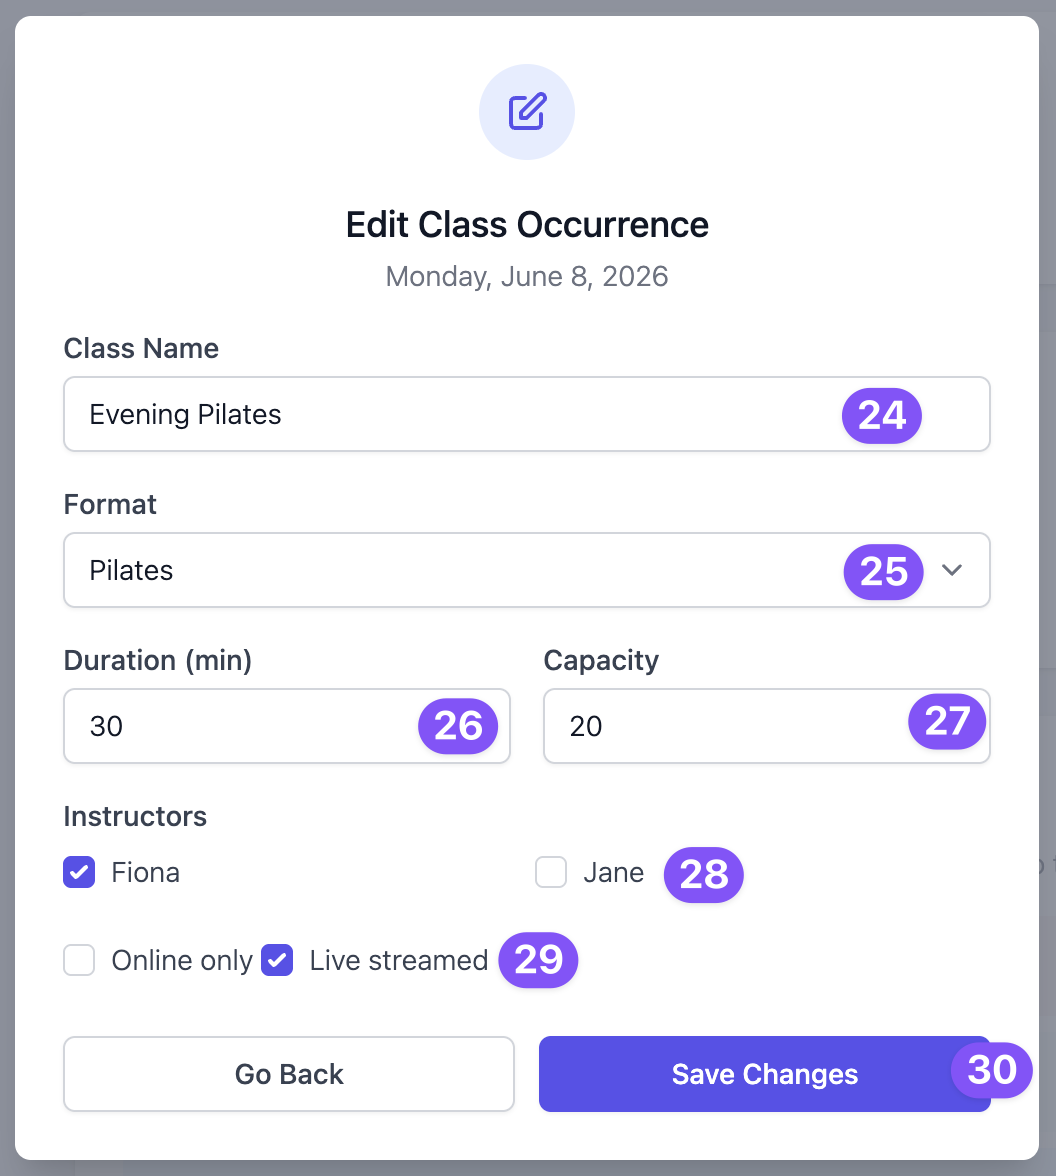
- You can edit the details of an individual class due to schedule change, instructor change, etc. First, you can change the name (if required).
- Change the format, if required
- Change the duration, if required
- Change the capacity, if required
- Change the instructor(s), if required
- Choose if the class is online only or live streamed
-
Click Save Changes

- You'll now see that this specific class was edited.
- You can click the Edit button to make further edits, or click Reset to revert to the default settings for this recurring class.

Cancelling classes
-
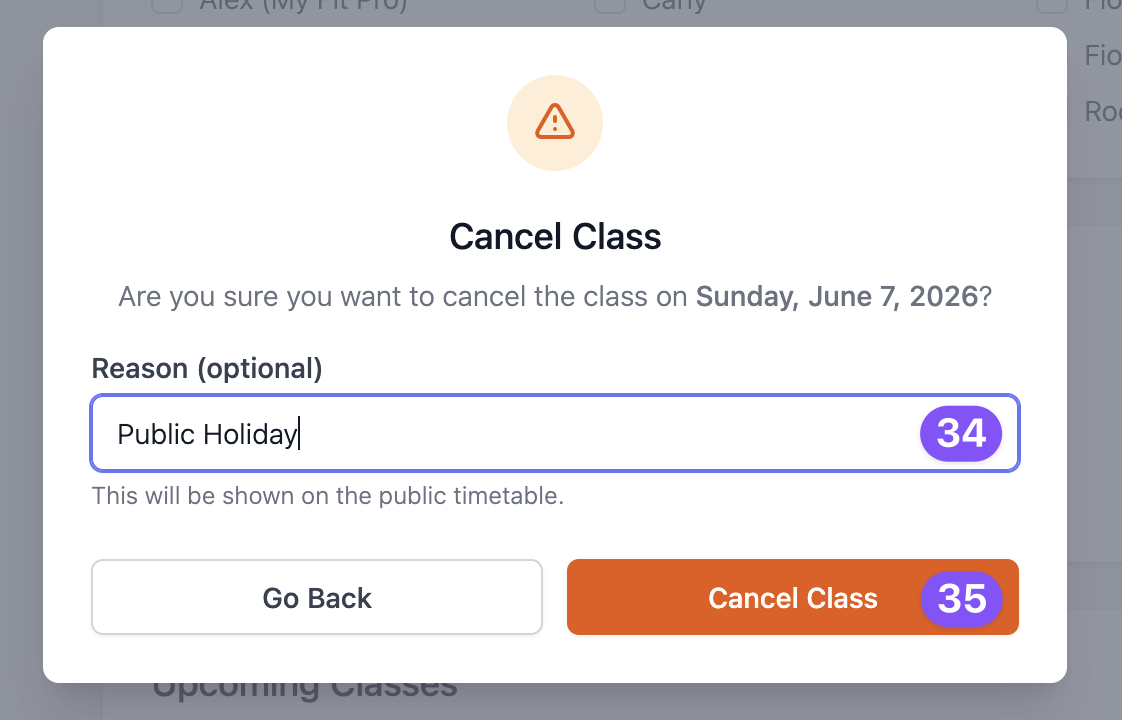
If you need to cancel an upcoming class, click the Cancel button.
- Enter an optional cancellation reason eg. Public holiday, Snow storm, Instructor unavailable
-
Click Cancel Class to confirm.
- You'll now see that the class is cancelled.
- Want to un-cancel the class? Click Restore.


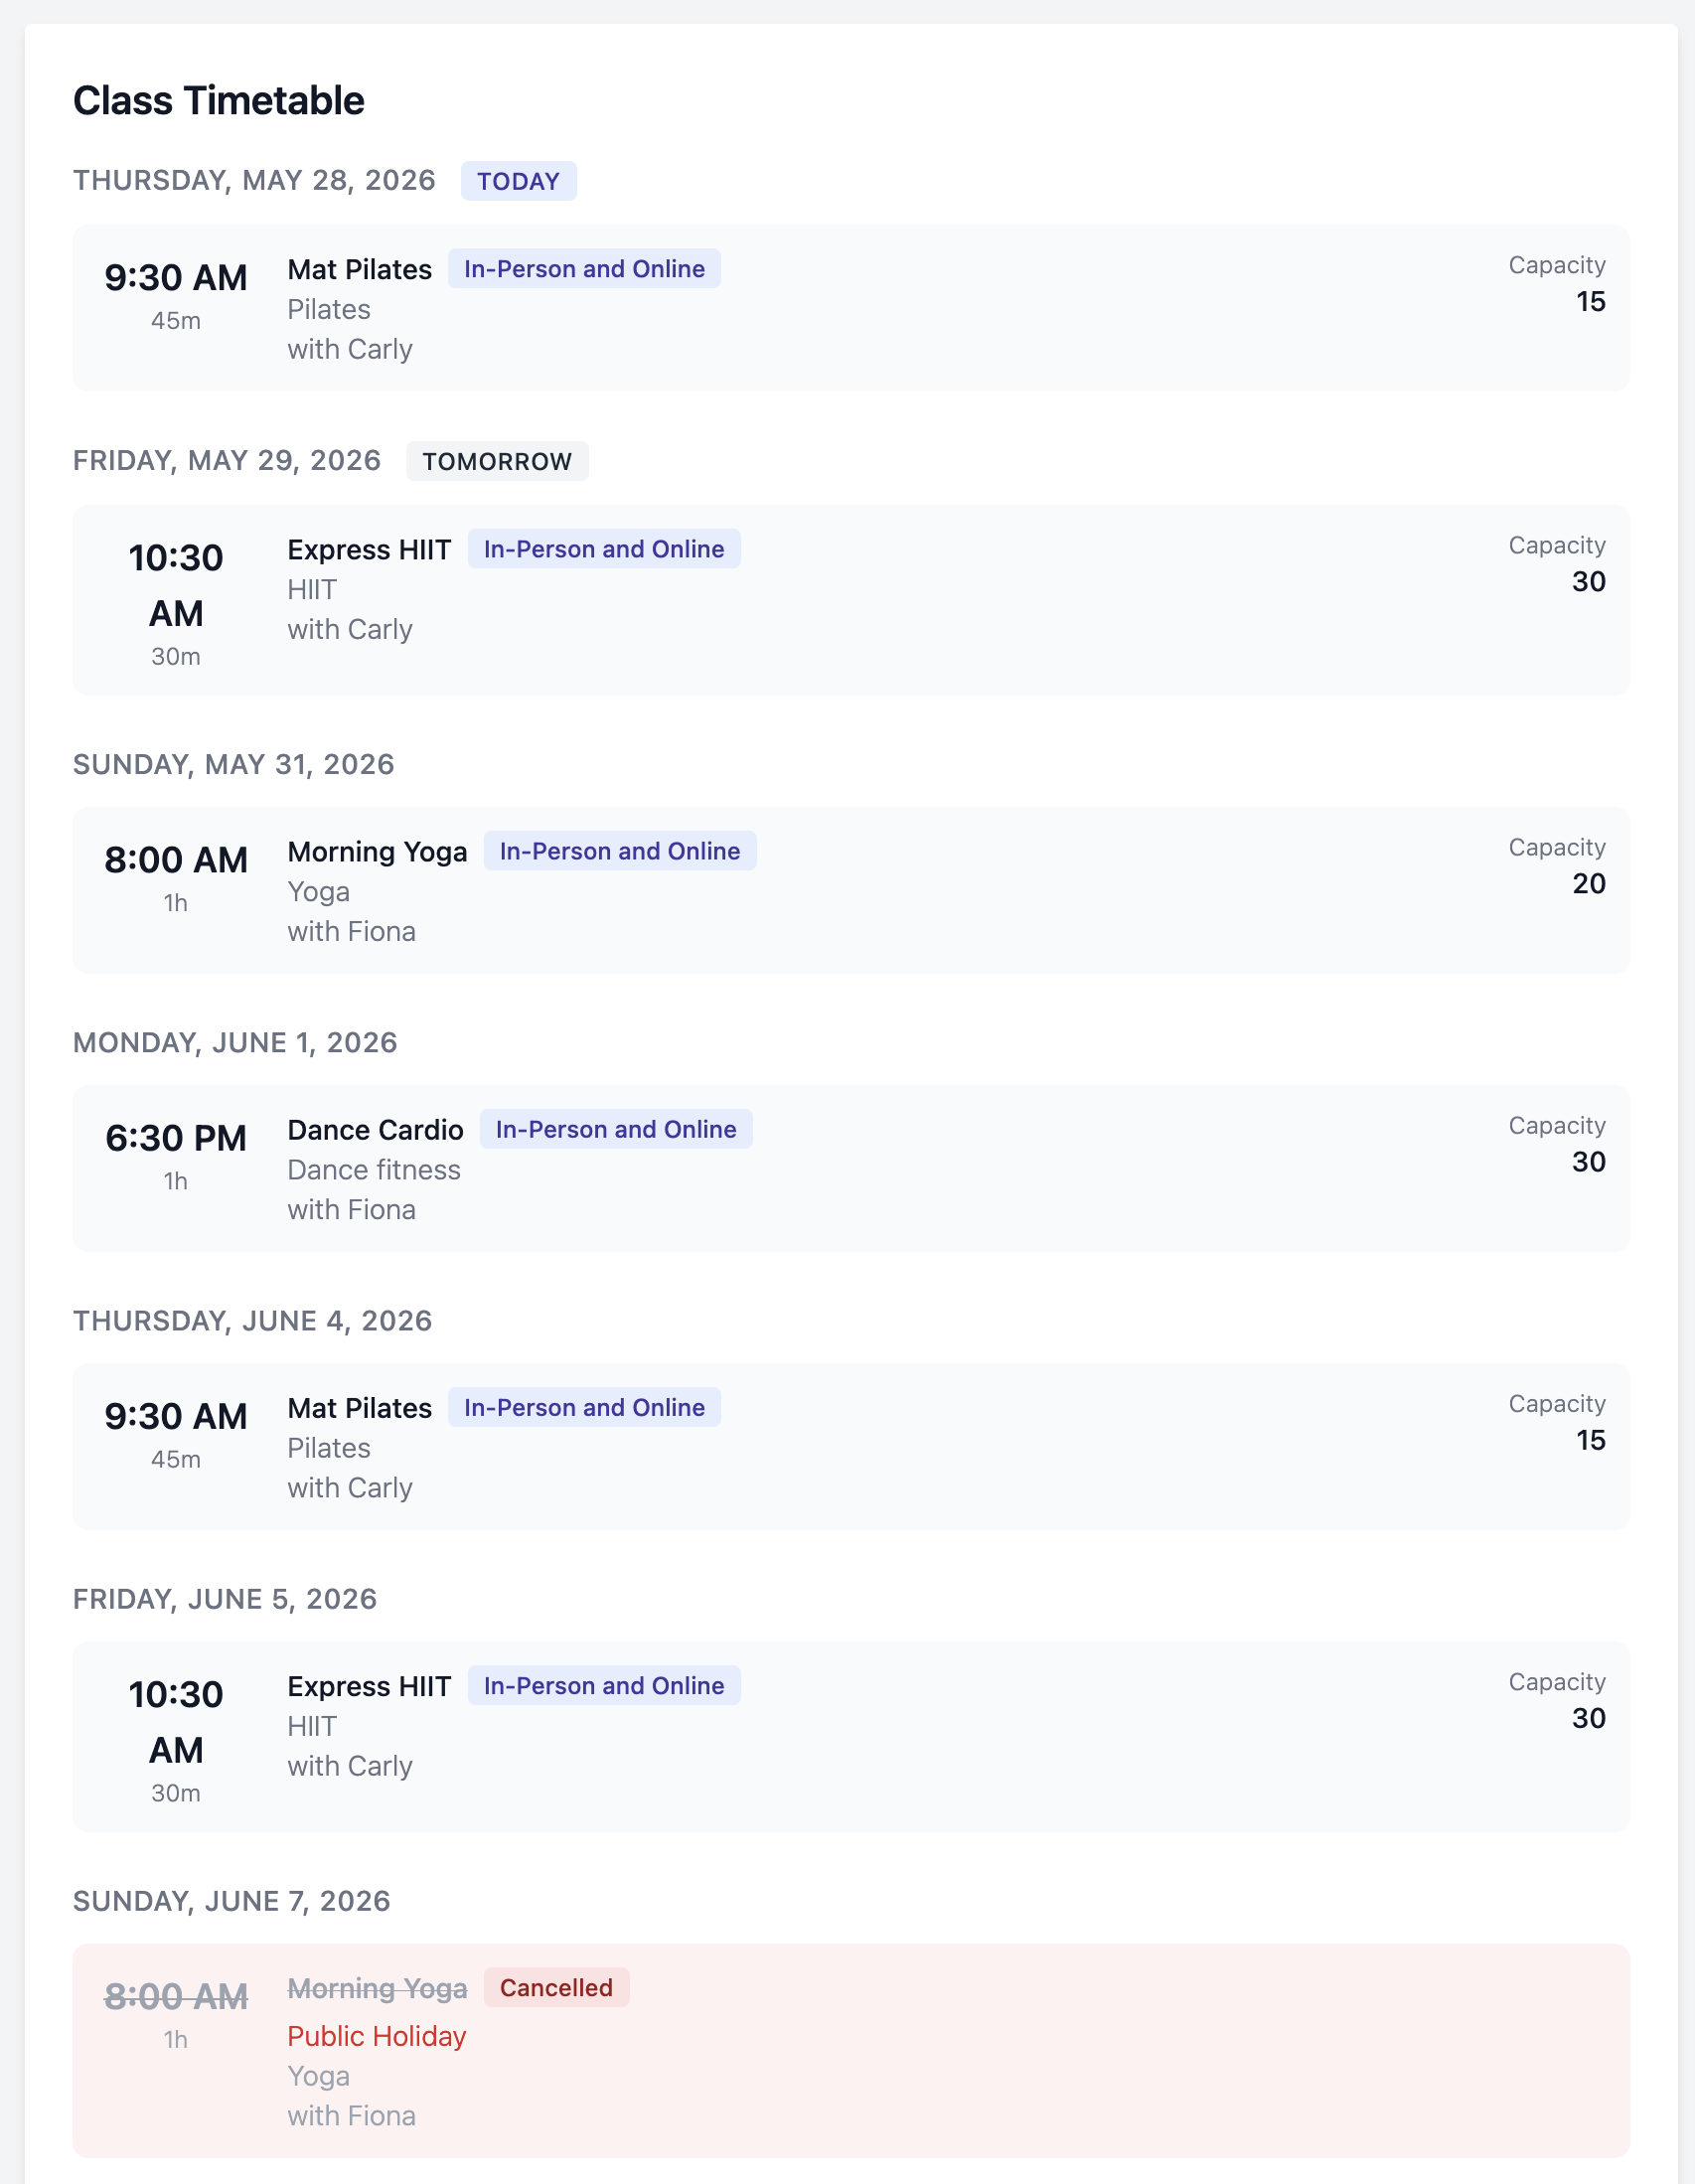
Viewing the timetable
-
If you've chosen to display your timetable publicly, this will be shown as a tab on your Live Stream member page.